Removing snow can be back-breaking but may often be better left alone. When it must be removed, be smart about it.
In Part I of this series, Damages to Concrete in Winter, we identified three forms of damages that occur in concrete. These damages, Scaling, Spalling, and Cracking are commonly instigated by the harshness of winter weather conditions. We also learned that these conditions are not just about cold and snow, but also about freeze-thaw-cycling, de-icing chemicals, and physical abrasion from plows, shovels, etc. Moreover, root causes for the formation of these damages may have entrenched themselves long before winter ever arrived. The exposure to winter conditions will give way to some form of damage. Still there are some things we can do today, that will reduce the opportunities for Scaling, Spalling, and Cracking to affect our work tomorrow.
Before going too far, it’s important to disclaim your work appropriately. Set the expectation for your clients in a way that lets them know you are educated and qualified to perform quality work with quality materials. Also let them know that concrete is not an impenetrable slab of kryptonite that you can mold to perfection. Being realistic is to concede certain facts. One of my favorite examples in the industry is the comment that was referenced in part one of the e-series “there are two types of concrete in this world: concrete that has cracked, and concrete that will crack.” This is a clever cliché that is both blunt and accurate. Once we get past the expectation of perfection, we can get back to business, and learn what steps we can take toward preventing winter weather conditions from destroying our work without a fight.
In an effort to reduce the risks for the development of Scaling, Spalling and Cracking, we have to acknowledge the materials we are working with, the tools and procedures we use (or avoid using) and the care and maintenance that will be ongoing. Though we have focused on the relationship between these types of damage and winter weather conditions, let’s temporarily dislocate the season from this section of our discussion and assume we may be talking about any job, at any day of the year. Our material list, that we’ll transfer focus to, includes the obvious concrete and the particulars such as colors, additives and finishing aids, as well accessory products like release agents and sealers. These are the target items for our materials, and then we’ll take a look at some tools and techniques that can be helpful and/or detrimental to the prevention of damages before getting into some care and maintenance tips. This list can be nearly endless so we will try to be thorough without information overload.
Materials
The Concrete
Let’s begin with the obvious material…our concrete. In its most simple sense, concrete is a four-part recipe – Cement, Sand, Stone, and Water. However, concrete as it arrives today is anything but simple. For a variety of reasons, it’s rare to find such a basic ingredient-list within concrete. Ready-Mixed Concrete companies have done an excellent job of researching their mix designs and providing quality materials, but understand what you are getting…ask questions to your salesperson or plant manager. What cement-substitutes do you use? What is your most-commonly used mix-design? Do you have the ability to vary/customize a mix design for small or mid-sized batches? Maintaining a good relationship with them may help you on multiple levels. Here are some key points for you to be aware of…The single-most important factor in your concrete for damage-prevention is AIR-ENTRAINMENT.
Air-entrainment has a direct relationship to nearly all forms of damage, especially scaling and spalling. Air-entrained concrete contains billions of microscopic air cells per cubic foot. These air pockets relieve internal pressure on the concrete by providing tiny chambers for water to expand into when it freezes. It’s important to know how much air-entrainment is appropriate for this region’s range of seasonal changes. It’s also VERY important to note that air-entrainment is not a fixed or specific factor. It should change with certain other elements within your concrete’s mix design. Referencing a Q&A article written by the staff at Concrete Construction Magazine, air-entrainment should increase as the maximum aggregate size decreases. Examples given suggest that an appropriate air-entrainment rate schedule is 6.0% for 1”-¾” aggregate, 7.0% for ½”, and 7.5% for 3/8” aggregate. Question this factor before dispatching concrete next time. Be aware that fly ash is a VERY commonly-used cement substitute in this region and it can have a high carbon content. This carbon content WILL lower your air-entrainment value that is critical to preventing scaling, spalling, and cracking. Ask your Ready-Mix suppliers about this and how you may be able to work together to maintain good levels of air-entrainment.
Water-Content is the second primary factor within your concrete that can be your friend and your enemy. In many ways, this is more important than air-entrainment but we list it second since most of the time, excessive water gets into your concrete because YOU put it there. Water: Cement ratio is a factor that determines how efficiently, or inefficiently, the two components work together. Generally speaking, the less water you use, the better. You should be able to trust your Ready-Mix supplier to deliver your concrete with a near-perfect cementitious weight, along with a reasonably low volume of water. But the amount of water that is added after dispatch is up to you. It’s common for many installers to defer to slump, as opposed to water: cement ratio. While they can be related, they are not the same. Your batch tickets should provide you with actual amount of water that has been added prior to delivery. This is much more reliable information than the estimation of slump. Slump is an ever-changing measurement and will vary from batch to batch; even between batches with identical water: cement ratio. Be aware of the real amount of water in your concrete and strive to maintain appropriate ratios (strive for maximum water: cement ratio of 1: 2 by weight, illustrated often as 0.50)
Additives
Everything that gets added to your concrete will have an effect on your perception of how it handles. In some cases, it may be negligible; while in others it will be significant. To keep consistent with the philosophy of keeping life simple, NEVER add things to your concrete without good cause and never add a second admixture to address the negative side affect of another. Less is more sometimes. That said, chemists who have a good understanding cement hydration as well as delivery and installation practices, have created many useful admixtures and additives. There is no way to take a glance at all of them so let’s focus on some common products.
Integral Pigments are one of the most common admixtures used for decorative concrete. Iron oxide pigments generally have little effect on the performance of concrete, though high-loading rates may require consideration, they are usually safe. There are several types of pigments that we suggest avoiding, the only one worth mentioning at this point is Carbon Black. In fact, just think of the word “Carbon” as a bad thing, negatively impacting our efforts here by reducing air-entrainment. It’s unfortunately common for us to be shown architectural specifications that call for the concrete to colored Black, or as near as possible, with Carbon-Black pigments. In these cases, Carbon Black pigment is capable of attaining a deeper black color than Iron Oxide black, but at the expense of air-entrainment. Carbon Black should be used for interior applications only. One final note on pigments for concrete: always be sure to observe the maximum loading rate limits for pigments. Most often, the budget for a project will break before you need to add pigment beyond the limit, but most pigments should never be added at loading rates that exceed 10% of the cement weight.
Retarders are used to slow the set rate of concrete and can be a useful tool when needed. These products should be used at low loading rates (1-2%) and are generally harmless. There are several types of retarders available so it’s important to research which ones are viable options for you, but most can be considered to be on the “safe list.”
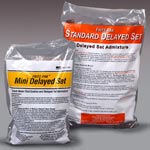
Accelerators are used to speed up the set rate of concrete and they come in several varieties; most notable are Calcium Chloride and non-chloride. (Of the two, it is important to note that calcium chloride accelerators should never be used with integrally colored concrete because it may create dark areas.) Ok, I have mixed feelings on this one. If you are pouring concrete in temperatures that are so low that these become necessary, you are already climbing uphill. Postponing judgment on this for now, most accelerators are assisted by the addition of hot water to the concrete. I suggest trying to use hot water alone in mild situations. If you have no alternative but to consider the use of an accelerator, be aware of how it will impact your concrete. Consult your ready-mix supplier andreduce the volume of concrete that will be dispatched if feasible. The chemicals themselves pose no problem but the surrounding conditions for this admixture’s use cause concern. It should be safe and even helpful to use, but know when to say when. We should not consider them a part of the “safe list,” at least not without an asterisk.
Fiber serves as secondary reinforcement within the concrete and is a fantastic asset to our effort in preventing winter damages. You may find fiber in a variety of forms from polypropylene, nylon, cellulose, and even steel. The most commonly available forms are polypropylene and nylon. They are both great tools in crack prevention as a secondary reinforcement. While fiber is only used as a complement to wire or rebar, it does improve green-strength and helps to minimize crazing and cracking as the concrete shrinks during the early curing stages. Data suggests that your greatest benefit comes with the addition of at least 1.5lbs. of fiber per yard of concrete but even smaller additions are helpful. We have found that most decorative concrete installers prefer a lesser volume of fiber, at or less than 1 lb. per yard. Add this to the “safe list” confidently.
Water-reducers are generally broken down by “range” based on the estimated volume of water they displace from your concrete mix. This group includes those admixtures specifically referred to as superplasticizers. A superplasticizier is a chemical admixture that will increase the flow ability of concrete without the addition of water. There is good and bad here, as is typical in the industry. The “good” is the aforementioned help in controlling water content. The “bad” is that they can increase slump. When intentional and calculated, this is fine, but without experience, it’s common for any good to be negated if the slump gets too high. Our recommendation is to avoid them as often as possible and take advantage of them when using an experienced crew on less-than-critical installations. As a general rule, it’s best to consider these “not for use” in stamped concrete applications. Because of the fine print associated with water-reducers, they can’t make the “safe list” but get an honorable mention for their potential.
Accessory Products
This list could take more pages than a dictionary so we will pick a few key products to address based on common perception. Many of these products are well known and commonly used but may be largely misinterpreted with regard to how they function to prevent winter time damage. Other products may be lesser known and under-utilized for the benefit they can offer. Some products have a function only within specific applications and may not be pertinent to other applications. Without further qualifications, let’s take a look…
Sealers are often touted for their abilities to limit moisture absorption into a concrete slab, or to protect from salt damage or staining, etc. Some of this is very true and proper use of most sealers offers benefits that pay dividends. But let’s make sure we understand that there are many different types of sealers that function very differently and offer different levels of protection. The easiest way to divide the category of sealers is to define two different types of sealer: “film-forming sealers” and “penetrating sealers.”
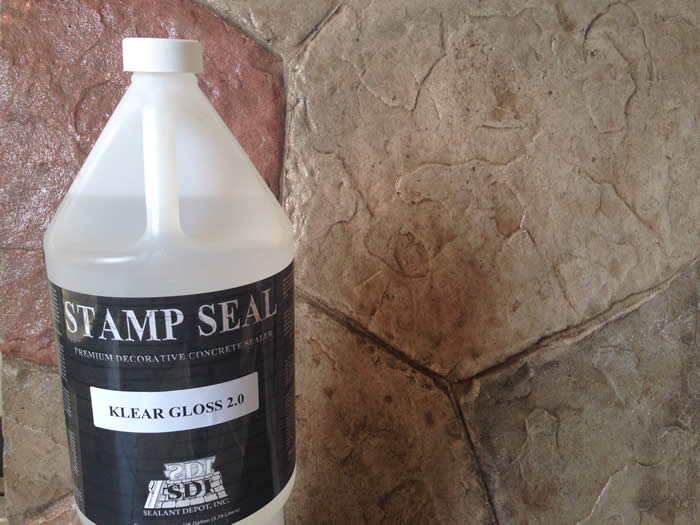
Film-forming sealers are a diverse group; examples are Cure and Seals, Acrylic sealers and Curing Compounds. These all are designed to offer concrete a thin layer of protection at the surface by forming a film. There are water-based and solvent-based varieties that can be made with many different components with varying degrees of quality. Though the resins and carriers can change, they all will yield a thin film at the surface of the concrete.
The Good: this film does offer resistance to staining, resistance to moisture transmission, can enhance color (especially solvent-based formulas), and improve aesthetics.
The Bad: they are not waterproof and while they limit absorption of moisture into the concrete surface, they also limit moisture’s ability to pass out of a slab.
If a film-forming sealer is able to penetrate well enough and establish a deep-seated bond line, the benefits far outweigh the drawbacks. Application becomes critical, however, to maintain an effective, thin film. If a film becomes too thick, more like a coating than a sealer, it can retain moisture within the concrete for extended periods of time, creating an opportunity for scaling to occur. The film itself may be subject to scaling at its bond line given the right conditions, as well. This is a common occurrence in stamped concrete where the value of the sealer is as much in its aesthetics as its performance. Oppositely, these film-forming sealers may offer little protection as they wear too thin over a service-life of 3-5 years. Overall, these sealers are a great tool for the prevention of winter time damages, but maintain good practices for surface preparation and application to avoid taking them too far.
Penetrating Sealers are generally invisible to the eye. Silanes and Siloxane are the two most common penetrating sealer types. These products can be reactive or impregnating but never form a film of any sort. This fails to assist us in stain resistance or aesthetics, but excels in regards to resistance from moisture penetration. Under heavy rains, concrete slabs treated with most penetrating sealer retain a dry look or water may even bead up and roll off. During a service life of 5-10 years, many of these penetrating sealers will limit the infiltration of moisture to nil. For decades, these sealers have been used to extend the life of concrete sections of roads and bridges because of their water-repellent properties. This also gives them a great track record protecting against salt-damage. While these sealers can be used over other masonry substrates, horizontally and vertically; their short-fall for decorative concrete is in their aesthetics (or really lack thereof). If not for concerns for compatibility, a combination of penetrating and film-forming sealers could be the best comprehensive sealing solution. This theory has extensive field testing to go through before becoming a realistic option.
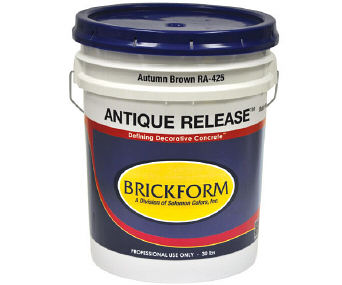
Release Agents used for stamped concrete installations have no direct impact on the formation of winter-related damage. However, they do impact the performance of sealers. Powder release agents are most often made with Calcium Stearate, a fatty acid. Others can be made with talc or a short list of other powders. There are also liquid release agents that may or may not be 100% volatile (meaning they evaporate 100% with proper conditions). All of the powders have a dual functionality, in that they are designed provide a releasing function for imprinting tools as well as transfer a pigment into thesurface. Liquids generally do not contribute color by themselves. After application, they are all generally washed. This is the point of concern for our topic. If you want your sealer to penetrate as well as possible, the first step is to clean and prepare the surface properly. Use a good, degreasing cleaner to really remove and clean any residue. Do this EVERY time. Then you can consider further preparation based on the sealer you have selected and your experience.
Antique Wash (EZ-Tique, Antique-It, Color Wash) products are applied over stamped concrete prior to sealer application. Take note of the surface preparation suggestions of your sealer. If you’d like to do an acid wash on the surface, or some other form of prep-work, this may be the time to do it. When using these products, be sure to follow mixing instructions properly. Once applied, these antique wash products almost always leave a trace amount of residue over the surface. It’s strongly suggested that these areas get buffed down or dry-scrubbed with a stiff-bristle brush, then blown off well before your attempt to apply any sealer.
Finishing Aids such as evaporation retarders are typically used in hot or windy conditions when pouring new concrete. If used properly, there is no cause for concern with most of these products. If over-used, they can directly lead to the formation of scaling and/or spalling issues. Most of these products dilute with water. I hope, at this point, we all recognize that too much water is bad for our cause. That goes double for water added to the surface of setting concrete. If you apply an evaporation retarder more heavily than its recommended coverage rate, it will impact the integrity of your concrete’s surface strength in a bad way. These products can be a life-saver and we strongly endorse their use when used sparingly and properly. Moreover, specific products like Lythic Day One can actually increase surface strength development and add a dimension of water-repellency when used correctly, all while still giving you the benefits of typical evaporation retarders. This product can be your ace-in-the-hole.
Tools and Procedures
Assuming we all have a general understanding of the proper practices for concrete installations, some of this may serve as simple list of reinforcements, and some things may justify a change in routine. First we’ll take a look at some tools that contribute toward preventing winter-time damage and then we’ll take a look at some tools to avoid. Many may be surprised to hear the impact of some simple tools when the procedures for their use are analyzed for our Northeastern climate.
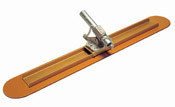
TOOLS can be just plain fun to collect and use, especially power tools, but separating the fun from the performance is critical. One great, classic tool that has gone missing from many collections is the wood float. A wood float, generally made of mahogany, can actually do a better job of properly floating concrete mixed at lower slumps than a magnesium float. With a little practice, you may find you can trim your water content down, and still draw a better surface with a wood float. Ultimately, a magnesium float can be used sooner and achieve a better looking finish, but the float is not a tool designed to be your final finishing tool, it’s designed to draw your surface to a consistent, workable cream, without too much separation from the aggregate. It’s also design to draw up moisture toward the surface when necessary. Fact: wood does this better than magnesium for tighter mixes. If you care to take this a step farther and spend a little more money, go for the canvas resin float. The canvas-resin float can work as well or even better than a wood float once you get comfortable using it. Once again, these two types of floats are excellent for mixes at lower slumps or mixes that are beyond the earliest set stages. Note that I did not specify “bull” float, but the same concepts apply whether you want to test it out with a bull float or hand float.
The use of Steel Trowels is really debated for use on exterior slabs. I should really say that nearly all major organizations in the industry strongly discourage trowel-finishing any air-entrained concrete. ACI (American Concrete Institute), PCA (Portland Cement Association), NRMCA (National Ready-Mix Concrete Association) all discourage trowel-finishing any exterior, air-entrained concrete work. Why? Trowels are designed to smooth off the cement’s surface after a float is used. This process creates a smoother, denser, “closed-pore” finish. The nature of the process is in contradiction to maintaining proper air-entrainment. Consideration is also given to the fact that the surface becomes more slippery, but this conversation is centered around Scaling, Spalling, and Cracking, so it’s the negative effect on air-entrainment that concerns us most. Most stamped concrete installers will struggle with this segment of discussion on the premise that their product looks far better when finished by trowel. ACI offers little recourse or alternative. Simply put…when using a steel trowel to finish exterior, air-entrained concrete (and all exterior concrete in climates exposed to severe freeze and thaw should be air-entrained), you will increase the opportunity for scaling and spalling to form. While this may be a difficult concept to enforce, it should draw consideration from all installers. If we continue to observe scaling and spalling issues when all other suggestions have been taken into account, then perhaps it’s time to lighten up on the use of the finish trowel.
If you’re not a communist, we all love power tools. There are few things cooler than running a power-screed, like a Vibra-Strike or Multi-Vibe. There is a fine line with these tools, however. Depending on the slump of the concrete mix and the level of vibration, you can actually over-vibrate concrete slabs. This is not a considerable concern for a slab that will live indoors, but for exterior concrete work, it can be disastrous. Vibration, or I should say “over-vibration,” can cause a distinct separation between the aggregates and finer material within a concrete mix. The finer, cementitious components of a mix will be carried upward with moisture toward the surface when vibrated heavily. This can also cause the closure of air-pockets and capillaries that help increase the tolerance for freeze and thaw. This separation WILL result in scaling and/or spalling in time. While power tools can improve production and quality in many cases, don’t let your tool obsession run too wild. Use power-screeds with caution and discretion. This type of tool may be best for concrete floors and left at the yard for the exterior jobs.
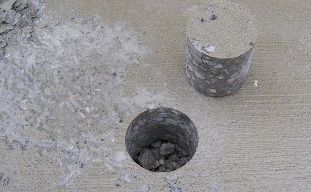
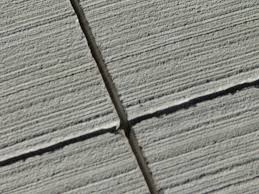
Proper use of Control Joints and Expansion Joints can reduce stress as the concrete cures and also as concrete begins to respond to declining temperatures. If you install these joints properly, you will find that the potential for crack development will be reduced. Cracks that form from sub-base settlement will not prevented at all with this plan, so continue to maintain good ground preparation in addition to these suggestions.
Expansion Joints are created to allow space for a slab to expand without pressuring another structure or slab. Expansion is bound to occur, less severely in winter weather, but that does not mean it plays no role in this forum. If created properly, these joints will allow for safe substrate expansion but they also can play a role to relieve stress within a slab during contraction. Always use true Expansion joints when you are pouring a new slab against an existing structure such as a foundation wall, swimming pool, pre-existing slab, etc. Expansion joints should also be used when there is a change in slab thickness or a change in supporting structure beneath the new construction, such as piers or footings. If used correctly, expansion joints can be a primary tool in preventing cracks, and certain cases of spalling in all weather conditions.
Control Joints are designed to relieve stress related to contraction. This occurs for two reasons: shrinkage from the curing process of new concrete and contraction due to declining temperatures. The degree to which a slab can contract is somewhat unknown, so what we are allowing for is a tolerance. Generally, control joints (aka contraction joints) are installed as a saw cut, but some can be tooled in as the concrete is finished. ACI has established criteria that I suggest all installers take the time to research independently, but we will cover some information here. For a concrete slab that is 4” in thickness, proper practices require control joints to have a maximum spacing of 10’ and be a minimum of 1” deep. If you change the slab thickness, use the following rule: joint spacing maximum should be no more than 30 times the slab thickness and the depth of the saw cut should be at least 25% of the thickness. This is a great start, but there are other factors to determine the necessity for a higher frequency of joints. Control joints are to be created in a grid fashion, creating squares, when possible. One overriding factor is that any space between control joints must have a length no more the 1.5 times its width. For example, a 4” slab that is 3’x 10’ must be jointed but must not be cut into two 3’ x 5’ halves since the maximum allowable length for a 3’ width is 4.5.’ Therefore, the proper joint design would be to incorporate two joints, dissecting the slab in three sections, each measuring 3’ wide by 3’ 4.” These joints must be installed or cut at least 1” into the surface to have a high rate of success. Using this formula will succeed most of the time but there are still considerations beyond this formula.
Variations in shape, elevation change, thickness change, width change, design features, job size, construction plans that include multiple pours, changes in sub-base are all job-specific factors that play vital roles in proper joint design. There are many more factors that come into play as well so you will need to think critically about each individual project. As a mass of concrete shrinks or contracts, any of a number of vital points may become the path of least resistance that gives way to a crack. When control joints and expansion joints are properly designed and installed, they can work together to prevent the formation of any unplanned cracking. With experience and help, making proper assessments becomes learned but never let opinion or hunches contradict the mathematical figures outlined by ACI. The job-specific details must determine the location of specific joints and those most function in harmony with mathematical design. Success will not come along without both sides of this engineering.
Care and Maintenance
Much of this responsibility will fall upon the homeowner or property manager since the proper care for concrete, especially decorative concrete, will require their cooperation. You will find a lot of different input from online and published sources that may be contrary to recommendations expressed in this section. We encourage you, as installers, to form your own opinion on certain suggestions based on your own observations. What you will find in this section is for your consideration and the information is based solely on our own collection of data from emails, calls, jobsite visits, and networking. It’s important to be able to share your own opinions with your clients. This information will be valuable to them and to you in order to keep your concrete work in top form.
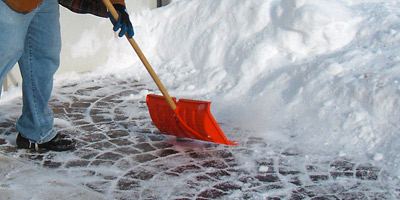
This winter has been exhausting for many property and home-owners. I, for one, am tired of shoveling my driveway and putting down ice pellets. Nevertheless, Old man winter keeps dumping more snow back on us. This brings us to step one…the snow shovel. What kind of shovel, when to shovel, where to shovel, etc.??? First off, let’s pretend all concrete work should be treated like its valuable, like its stamped concrete. No concrete work should be trashed by a DOT road plow because it’s just plain white concrete. So, for the purpose of this section of our discussion, all concrete will be treated the same.
So, what does this mean for the old, rusty, twisted, dented metal snow shovel in your garage? Save it for a lab-experiment about tetanus, throw it out or keep it for home protection, but it doesn’t touch your concrete! Get a plastic-blade snow shovel for your clients for $15 if they ask and charge them double what you bought it for. You will be doing them a favor.
Snow blowers are another item we love and love to hate. Generally speaking, all of them will scratch concrete. Most of them have screws or metal parts underneath that drag, and some of them work slower than a shovel anyhow. Now, I understand that not everyone is willing and/or able to shovel their driveway and walkway multiple times per month, as this season has demanded. So let’s just move on, under the assumption that they are going to be used anyhow. I was on a call with a very good concrete installer who was meeting with a concerned client. He had a stamped concrete driveway that was beautiful. The homeowner had seen a recurrence of minor scaling over two winter seasons. Upon inspection, all three of us noticed a particular pattern to the surface damage; it was originating in thin strips that seemed to be spaced out by about a couple of feet. Within a few minutes, we all took a walk into his shed, where the homeowner had kept his snow blower. Well, as it would figure, his snow blower had two small metal feet that contacted the ground and would scrape as it propelled itself through the snow. Those feet were a perfect match to the damage pattern on the concrete. In this case, the snow blower may have only been part of the cause, but it certainly was contributing to the damage. The lesson here is to advise your customers to keep their snow blowers well-maintained, minimize their use, and to be aware of any possibility of it causing damage to the concrete surface.
Ice-melters & rock salt, when not in such short-supply, are commonly found at hardware stores and big box stores everywhere. Many of them proclaim that they are “concrete-safe.” Let me be clear about this…if it melts snow by chemical reaction, IT’S NOT CONCRETE SAFE! Please don’t point to some product label that says it’s safe for all concrete as some counter-argument. I have seen this claim posted on the front of bags and cans in ten different stores. I have bought some of them, and I have used some of them. Mostly all of them also have an interesting section of text on the back of the package that says something completely different, like this… (I’ll paraphrase because the print is much smaller and a little harder to read than the large font on the front that gets most people to buy it) “Not for use on new concrete or concrete less than two years of age.” This section is usually found right before the warranty information that denies their responsibility for the damage to your concrete. Of course your customers need to use something to prevent everyone from slipping and falling. Suggest clean sand or cheap, clay kitty litter (beach sand is not an acceptable alternative and contains reactive sodium and calcium based salts that you’d like to steer them away from).
Clearing the snow from many areas is necessary. Areas such as municipal walkways and driveways, and areas for public use should be cleared and safe-guarded with sand or kitty-litter as recommended above. However, it may be in most peoples’ best interests to avoid clearing snow and ice from areas where it’s not required. Contrary to popular belief, its best to avoid shoveling off your patio or pool deck if it’s unnecessary to use or have clear access to that space. By leaving it covered with snow and ice, the concrete is actually insulated better against temperature fluctuation. Remember, it’s not just cold temperatures that cause damages, its temperature fluctuations that create freeze-thaw cycling that can be most devastating. If a slab stays covered under a blanket of snow, the light of day will not have the opportunity to warm the surface as easily and the temperature will remain more constant. Let snow and ice melt away naturally when it’s feasible and you may have saved that surface from dozens of freeze-thaw cycles.
Re-seals on stamped/decorative concrete are done with film-forming sealers to maintain color and to prevent stains and certain forms of damage from starting. Homeowners and property-owners are encouraged to contact to you, as the installers, periodically, to perform re-seals. I would strongly suggest minimizing re-seals to a frequency of no more than once every 2-3 years and only as needed. Moreover, due to the probability that a film-forming sealer will hold moisture within a slab, its best to avoid doing re-seals late in the year: the best value for a re-seal is in the spring. Many homeowners and property owners will be interested in performing their own re-seals. This is something that is best done by professional installers because the surface preparations and conditions, as well as the method of application, and possible product dilution. Your experience with these factors will improve the opportunity for these sealers to perform their best.
So here we are in February, too late to undo what’s done and the winter has been brutal. We can expect that a lot of concrete has met with conditions that have shown no mercy. In the final part of this series, we’ll discuss how to deal with Scaling, Spalling, and Cracking issues that have already arisen. With all the efforts in the world, sometimes we all need to concede that Mother Nature is tougher than man and all that man can create. As tough as she is, we need to have the flexibility to heal our wounds and make repairs. Many of these repairs can be made fairly quickly and inexpensively but your best weapon to protect your work is prevention.